StitchSmart

StitchSmart

Pages

Showing posts with label my patterns. Show all posts

Friday, 5 June 2015

Mission (almost) accomplished

Sometimes I am almost willing to admit that I do not lack self-discipline*.  Remember my three WIPs from recent entries?

NO. 1 - FINISHED!!!!!!**

crochet beach tunic

Finished, blocked, done, almost forgotten about.  Not my favourite project in the world, although I'm reasonably satisfied as to how it turned out in the end. 

Lace-up sides result solely from my impeccable fashion sense and have nothing to do with any sizing problems, nothing what-so-ever.

crochet beach tunic

They DO look nice though, don't they? 

PATTERN: my own improvisation, 100% cotton, +/- 300g, 3 mm crochet hook.  I don't like it enough to give it a proper name. 

NO. 2 - FINISHED

Believe it or not, my knitting mojo held and I finished Iris a good few days ago.  It's stretched for blocking now, waiting for any half-decent weather that would allow me to snap some pics. 

BTW, I almost ruined the shawl at the very last step.  A new (to me) bind off technique, described in a tutorial as stretchy and perfect for lace, turned out to create an edge that is very beautiful and...  completely inelastic.  It is also impossible to undo without destroying the yarn so now it's either some very complicated knitting surgery on lace yarn or ignoring the problem and letting it stay as is.  Bound off edge in this particular project is short, so it doesn't look quite so bad.  I think it will pass muster, but only just.  In the end, no harm done, but my joy at finishing the knit is tainted. 

NO. 3 - 90% done. 

On hold for 24-48 hours.  Not my fault.  Too boring to explain. 

Anyway, I'm damn proud of myself.  I really, really, really felt like ditching all those WIPs and starting something new.  I deserve a medal.  Or a cake.

Or a teeny, tiny, super quick sock...

sock in progress

* Do not ask me about cleaning, though.  Or sweets.  Somehow my self-discipline never stretches that far.
** Relief directly proportional to the number of exclamation marks

Wednesday, 4 March 2015

A story of one unexpected hat

I don't do hats and that's a rule.  I grew up in a place with proper winters and as a child I was forced to wear one.  It was an endless source of arguments with my parents, and I have quite a lot of unpleasant hat-related memories.  To add insult to injury, my head is massive and finding a hat to flatter is almost impossible. 

Having said all that, here is my brand new creation:

knit hat

Yeah, I know.  When it comes to rules, I'm a sticker, aren't I? 

To be quite serious, I don't know how much wear this hat is going to get, but I simply had to make it.  Serendipity works like this sometimes, at least with me.  I get an idea, however improbable, and I can't get it out of my head.  The pattern writes itself in my mind, almost as if it grew there on its own rather than being in any way created.  It started with me wondering what to do with sizable Amaryllis leftovers and hey presto, the Unexpected Hat is the result.

knit hat

Initially it was to be a brimless, slouchy beanie, but once I had knit enough to try it on I realised that brimless hats make me look like a total moron.  I was this close to ripping the whole thing up!  Fortunately, I decided to try the rolled up look and it wasn't quite as bad.  I still don't qualify for a magazine cover but at least I can wear it in public. 

The question is - should I add a pom pom?

I thought my Puppy might be a better model than me, but getting her to stay still for more than a second is a bit tricky.  Still, she's cute, ain't she?

sheepdog in a knit hat

Pattern:

My own.  5 mm needles, circular, aran weight yarn. 

Thursday, 12 February 2015

Amaryllis, all done

Ooph...  It took me a while to knit and even longer to photograph and present, but my aran Amaryllis pullover is finally, gloriously finished.  I confess to feeling some relief here, I was bored out of my wits with this longish knit, even though the design itself is anything but boring. 

aran knitting pullover

I find most traditional aran sweaters, with their boxy shape and crew- or turtlenecks, rather unflattering (unless you are a stick figure of a person, which I am not).  Therefore, I reached for the big guns and went for rather drastic waist shaping.  If you don't have much of a waist, you need clothes that create an illusion of one!  Additionally, Amaryllis has enough positive ease in all the areas that shouldn't really be highlighted (belly, in my case), while keeping an overall 'fitted' appearance. 

aran knitting pullover

To tell you the truth, I am very, very happy with how it turned out (and that it's finally done...).  The armholes are slightly bigger than I would want them to be but I don't think that's a problem.  The sweater is super warm, wonderfully comfortable and since its premiere, I wore it for an embarrassingly long time before finally throwing it into a washing machine.  Oh yes, it's made of acrylic/superwash wool blend so I can machine wash it as much as I please. 

aran knitting sleeve

Much of Amaryllis was improvised on the go and I tried a few techniques that were new for me, e.g. saddle shoulder and short row sleeves knitted up the armholes once the front and back were joined.  Getting the whole thing right was a bit tricky, but tell me, wasn't it worth the effort?

aran knitting detail

The pullover was worked in the round up until the armscye, then divided into front and back and worked flat, leaving stitches in the last row live.  These I used to 'anchor' the cable that joins front and back.  Once all live stitches were used up, I knit up a round along the armhole, shaped the sleeve cap with short rows and worked in the round decreasing in more or less regular manner until the sleeve reached desired length. 

Knitting arans in the round is universally considered a bad idea, but I took my chances.  I used around 650g of aran weight yarn, so I hope the pullover is light enough to hold its shape without any additional structural strengthening.  If, however, I notice any stretching, I'm going to implement plan B: reinforcing crochet chains on the wrong side in all the crucial areas.  Hopefully I won't need to, because I really want to focus on other projects now. 

Socks coming up next!

Sunday, 27 July 2014

Finished! - Mayabee, or Once More With Feeling

Just one last toddler knit and I'm done for a while.  That is, the string of July birthdays is over, but it looks like there are a few commissions headed my way so I'd better not call it a day before the sun sets... 

Anyway, here's my toddler pullover no. 2, Mayabee.


I'm quite proud of it, you know?  It turned out even prettier than I ever thought it would.  Textured fabric is quite decorative in itself, braids on sleeves and all, but it's the hood that really makes the piece this time. 

It was my first time knitting a hood and I was a little anxious.  No need - hoods are easy!  I loosely followed an excellent tutorial found here, improvised a little and voila!  My hood even has a pompom...


...and a tiny lacy pattern where I had to increase for depth. 


The best news of all, Mayabee fits its owner almost perfectly (sleeves could be a little wider towards the shoulder, but I'll correct for this if/when I publish the pattern).  It looks adorable on the little girl it went to;  I might convince the parents to lend me a shot or two for the blog.  Check back in a while :)

PATTERN:

My own. 

It is sized for a one year old, but one of the commissions mentioned above is for a two year old version.  I'm not confident enough of my pattern-writing skills just yet, but please let me know if you would like to see instructions for Mayabee released into the world :).

Wednesday, 16 July 2014

Finished! - Verca

As mentioned before, July is a Month of Small Knits for me.  Another soon-to-be birthday girl, another toddler garment.  This time a pullover, named after the future owner.

knitted pullover for a toddler

The pattern is really simple, no armhole shaping and only a few gentle decreases on sleeves.  I'm sure even a complete beginner will fly through it with no difficulty.

Pieces are worked separately on straight 5 mm needles and stitched up afterwards.  I used acrylic self-striping yarn, DK weight.  By pure chance I achieved colour symmetry - stripes on front and back are a perfect match, sleeves identical.

knitted pullover for a toddler

Both front and back are worked in a neat, square grid stitch, with a garter stitch border.  Back is a bit wider than the front, hence the trapezoid neckline.  Sleeves are simple stockinette with border to match the body.

knitted pullover for a toddler

Surprise, surprise, I've finished the sweater off with crochet flowers.  Yes, I know, it gets monotonous.  I am through with the crochet flower binge though and you won't be seeing them here for another while. 

Neck opening is edged with a simple crochet stitch, with a button added on each side.

knitted pullover for a toddler

As you can see, my puppy is always eager to assist in the photo shoot!

knitted pullover for a toddler

One more toddler knit coming soon:  a textured hoodie for a one year old. 

PATTERN:

My own (with the exception of crochet flowers). 

The Verca pullover will be gifted away in another week or so and if it turns out that I achieved a reasonable fit, I will share the pattern here, for free.

Saturday, 28 June 2014

Finished! - Poppy Girl

Knits are happening so fast around here these days that I don't even have time to show them as WIPs before they become finished objects. 

Here's one I'm really proud of - Poppy Girl. 


There are few children in my life but those that are somehow connected to me were all born in July, so June is a month of baby knits.  My niece is turning two in a few weeks and I had been brainstorming about something pretty for her since May.  I hope Poppy Girl will be just the thing - if, that is, it fits!

I sneakily measured the soon-to-be birthday girl so I shouldn't be too far off mark.  Just in case, I worked the top part in rib to make it stretch extra wide.


Poppy Girl is knitted from bottom up on circular needles.  I used extra elastic bind off technique (really worth checking out) and instantly cancelled any benefits it gave me by adding not-so-elastic crocheted edging *sigh...*. 

Do you recognise the flowers?  I fell in love with this simple but effective design and now I'm adding them to (almost) all of my knits. 

I am absolutely smitten by the flowers-on-lattice combination:


Each flower is stitched on, first the centre with yellow thread and then petals with red.  It took ages (ekhm...  two days...), but the effect is worth it -  flowers lie nice and flat and I dare say they will survive washing, too.  It may not look so great on the wrong side but hey, nothing's perfect.


Speaking of not perfect, my Poppy Girl has one serious snag.  When adding crocheted edging around shoulder straps, I made too few stitches and the whole thing curls up no matter what I do to keep it flat.


I might yet rip the edging off and re-crochet it, because I feel this curling really spoils the effect.  I might.  We'll see.

PATTERN:

My own, except for crochet flowers (found here). 

Wednesday, 25 June 2014

Positive ease

One thing that I keep forgetting about is that positive ease is good.  Unless you have a perfect, gymmed up body, positive ease is ALWAYS better than zero ease.  Case to prove the point?  Here you go. 

My partner's Mum, W., is staying with us this month and since she is about two dress sizes smaller than me, I lost no time in coaxing her to model for me.  Right after she put Negativium on I knew that it's going to stay hers.

knitted cotton top

On me, Negativium looks just about right.  If I remember to hold my belly in and not to slouch, everything's fine, more or less. 

When W. puts it on, she instantly looks stunning.  The word here is EFFORTLESS. 

Positive ease, that's the key.

In my defense, I had only limited amount of yarn for this design, so I had to be stingy with any extra fabric. 

To tell you the truth, parting with Negativium didn't actually break my heart.  I bought the yarn because I found a bargain too good to pass by and colours are not exactly mine.  Plus, earning brownie points with (almost) mother-in-law is always a good thing :).

By the way, this time I managed to get a good shot from the back.  Just in case you wondered why the pattern is called Negativium...

knitted cotton top

In other news, here's my puppy (she's nine months old, so technically still a puppy) sleeping on three paws for a pillow.  I should've added a dog-shaming message saying I ATE THE FLOOR...

sleeping sheepdog


Friday, 20 June 2014

Finished! - Negativium

With Carefree Blue officially done, it was time to get Negativium off the blocking mat (ekhm... carpet...) and back to the workshop.

knitted cotton top

Initially, I wanted to add a few decorative elements (like crochet chains threaded through the fabric) but in the end I decided to keep things simple. I stitched two parts together and voila, I had another hand-knitted garment in my wardrobe.

knitted cotton top

Despite my worries of Negativium being too small, it fits perfectly.  Too perfectly, in fact - there is exactly zero ease in all the crucial areas and I'm seriously unsure if I have body for this anymore.  After seeing pictures from the photo shoot (and, believe me, instantly deleting a few), I decided to say a tearful farewell to my beloved sweets.  Wish me luck, and strong will.

knitted cotton top

Negativium was knitted on straight 3.5 mm needles, with three skeins of cotton worked simultaneously and fourth added at neckline (x2).  It ate up slightly over 300g of yarn.  Where colours meet, I simply knitted two yarns together although now I think that intarsia technique would probably work better.

PATTERN:

My own.  I charted stitches up as I went so I can write up a pattern if anyone is interested.

Monday, 16 June 2014

Finished! - Carefree Blue

I'm proud to announce that I perservered and finished my Carefree Blue pullover.

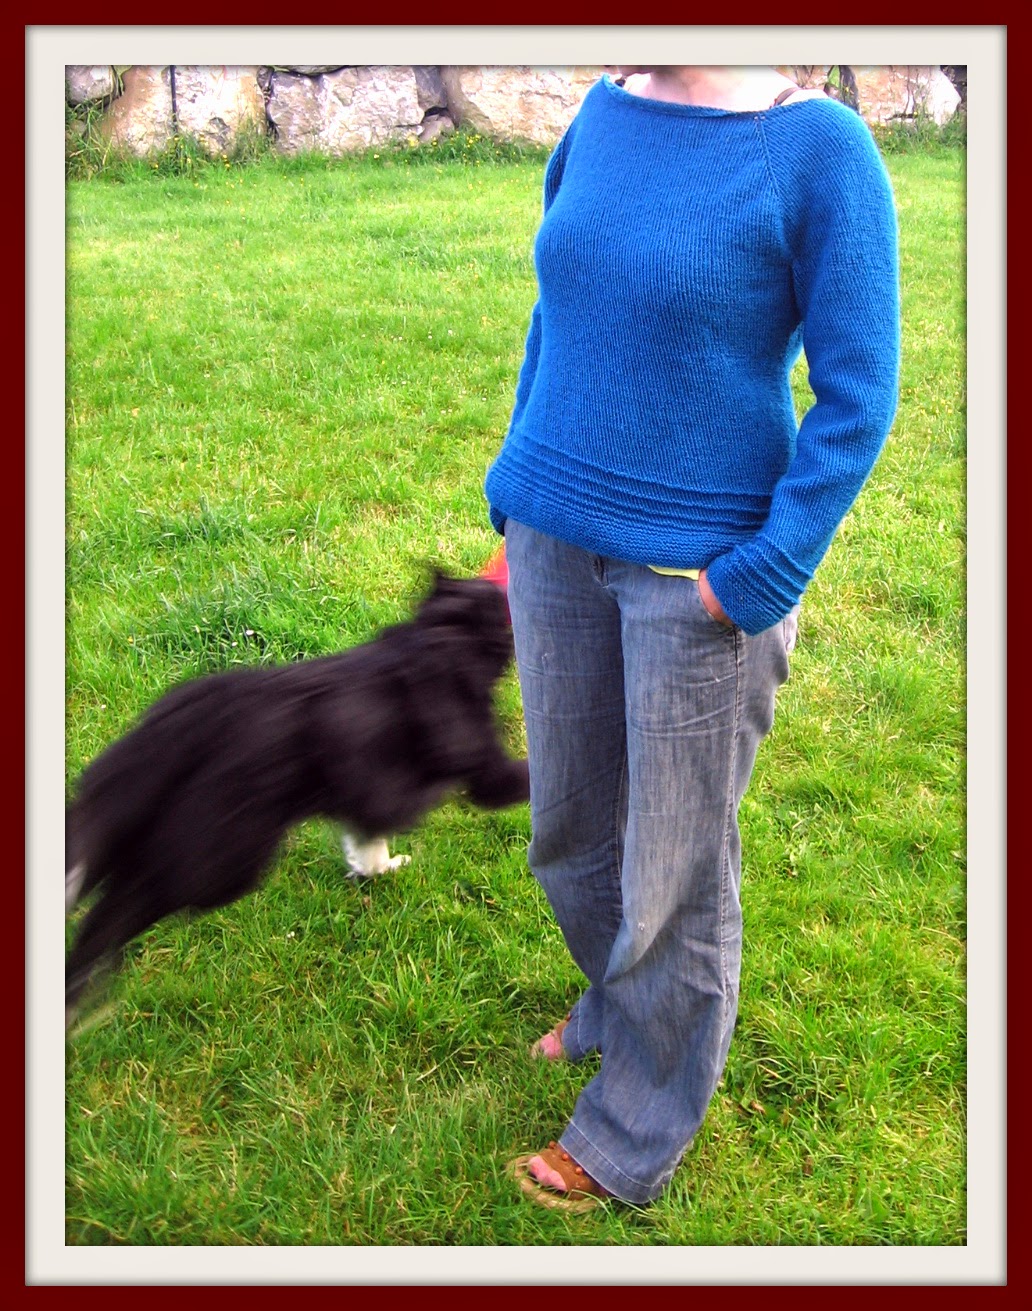
blue raglan pullover

It turned out pretty neat, so much so that now I'm not quite sure why I wanted to destroy it in the first place.  Must've been a case of almostdoneitis.

Let me explain.  Very often (about 95% of the time), when I'm about three quarters through a knit, I suddenly get a feeling that whatever I'm working on at the moment is awful, is not going to fit and generally sucks on all fronts.  It's a very strong feeling too, a source of genuine frustration and unhappiness.  I always knit on, if only because it would be a shame to just rip all this work and in the end everything turns out to be just fine.  The garment fits and is just what I had planned it to be, frustration becomes satisfaction.

Do you ever get that, or is it just me?

blue raglan pullover on model

Anyway, Carefree Blue survived almostdoneitis intact.  What do you think?

It's very warm (not necessarily an advantage now in June but I'll sure as hell appreciate it in November) and comfy, with really nice balance between attractive waist shaping and diplomatic positive ease.  I can already tell that it's gonna be one of my favourites for a while :)

twisted stockinette stitch

It's almost all twisted stockinette, with matching accents in garter stitch on sleeves and hem.  I prefer continental knitting and my favourite technique automatically twists stitches when working in the round.  I can correct this if I want to, but in the case of Carefree Blue I kind of liked the effect, so twisted the stitches remained.

PATTERN:

My own improvisation :)

a curious chicken

Bonus:  one of my chickens, Hades, watching the photo shoot.  Despite masculine name, it's a girl and it is a special day in her life:  today she laid her first egg ever!

More finished objects coming soon.

Tuesday, 27 May 2014

Knitted vest in (awful) electric blue

Would you like to see the very first garment I ever designed?  Yes?  Your wish is my command.  There you go:

knitted vest

When I was about 8 years old, I decided I want to knit a sweater.  My wonderful Mum took me to a yarn shop, let me choose whatever materials I wanted and patiently guided me through the knitting process.  As far as I can remember, I almost finished the back of my sweater before I lost interest and the project was abandoned. 

20 years on I asked Mum to share some of her stash and that very same yarn arrived in the post.

One thing I know for sure - the eight year old me had the most awful taste imaginable.  I almost wept, because there was no way in hell the adult me would wear anything in this horrible shade of electric blue, oh no. 

Luckily, my partner's Mum, who was staying with us at the time, expressed moderate admiration for the colour.  On a blonde like her, she said, the shade would look great.  On the spot I promised an electric blue garment just for her.  That's what you get for being polite, hah hah. 

My passion for knitting freshly rediscovered, I decided to design my own pattern.  I got quite ambitious, and even though I had never knitted cables before I chose the most complicated one in my book*.

knitting - cable detail

The cable was a bitch to knit - please don't choose it for your introduction to cables, unless you like challenges - but many swear words later the vest was complete, embellished with buttons (ah, buttons...  There will be a post about buttons, I promise) and gifted away. 

It may not be the most beautiful or intricate design in the world.  Still, for the very first design in my portfolio, I dare say it's pretty decent.  Would you agree?

Oh, that weird neckline is not something permanent, it's just how the vest was laid out for the photo :)

PATTERN:

My own but most likely unrepeatable, because I have no clue where my notes to the project might be. 

* The book, if you're interested, was called The Knitting and Crochet Bible.  I've outgrown it since but for a beginner knitter (or crocheter), it is a fabulous resource. 

Saturday, 17 May 2014

Colour Fiesta cross stitched bag

Another project from long ago, this time cross stitched.  Knitting and crocheting are my preferred fibre crafts, but once in a while I get the irresistible need to grab a proper sewing needle.

cross stitched bag

Stitching up a bag like this takes eternity.  The embroidered part clocks (precisely!) 24,336 cross stitches, so, as you can probably imagine, three or four months of intensive sewing passed by before the project was completed.  I'm not complaining, not at all.  I seem to have a natural knack for large, time-consuming creations.  I don't find them tedious at all, especially if - as in this case - pattern and colour changes frequently. 

cross stitch work in progress

I'm not much of a visual artist, but I can handle geometry.  Each square is composed of very simple shapes, symmetry and colour do all the work when it comes to final effect. 

A few of my favourite squares, close up:

cross stitch square


cross stitch square


cross stitch square

Finishing projects off is my Achilles' heel and it shows.  From a distance is doesn't look THAT bad, but when you look up close, the imperfections are obvious.  I got better since then, fortunately :)

cross stitched bag


cross stitched bag

Back of the bag is made from upcycled upholstery fabric (an old swatch book from a furniture shop can be priceless if you know what to do with it).  Front and back are joined on three sides by handle strap - length of thick felt wrapped in lining fabric.  Lining and satin ribbon on the opening edges to neaten them up complete the job. 

Snags or not, I'm quite happy with my little bag.  Such a festival of colour simply cannot fail to lift one's mood. 

cross stitched bag


PATTERN:

I copied one little square from a schematic found somewhere online, otherwise the design is entirely my own. 

I will be happy to make it available if anyone's interested, but mapping out a diagram this size involves a bit of work and I will do it only if I know that someone wants it. 

If you would like to purchase the schematic for this project for a small fee, please let me know in the comments or email me and I will write it up for you.